How to add a New adjustment layer in Adobe Premiere Pro 2022?
- To create an adjustment layer, simply click the “New Item” button in the Project panel
- Select “Adjustment Layer” from the drop-down menu
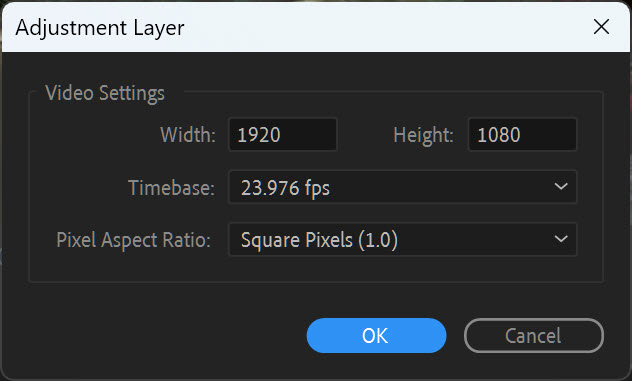
- This will create a new, blank video layer in your project, which is the Adjustment layer.
Adjustment layer in Adobe Premiere Pro allows you to make global changes to your video clip
For example, if you want to add a vignette effect to your video:
- You can create an adjustment layer,
- Apply the vignette effect to the layer, and then
- All the clips below the adjustment layer will inherit the effect
In this article, we’ll show you how to create and use adjustment layer in Adobe premiere pro
What is an adjustment layer in premiere pro?
- An adjustment layer is a blank video layer that you can add to your project, on which you can then stack an unlimited number of video or audio effects. These effects will then be applied to all the layers beneath it.
- It can be used to modify the attributes of other video clips in your project. You can use an adjustment layer to apply color correction, blurring, or other effects to all the clips beneath it in the timeline.
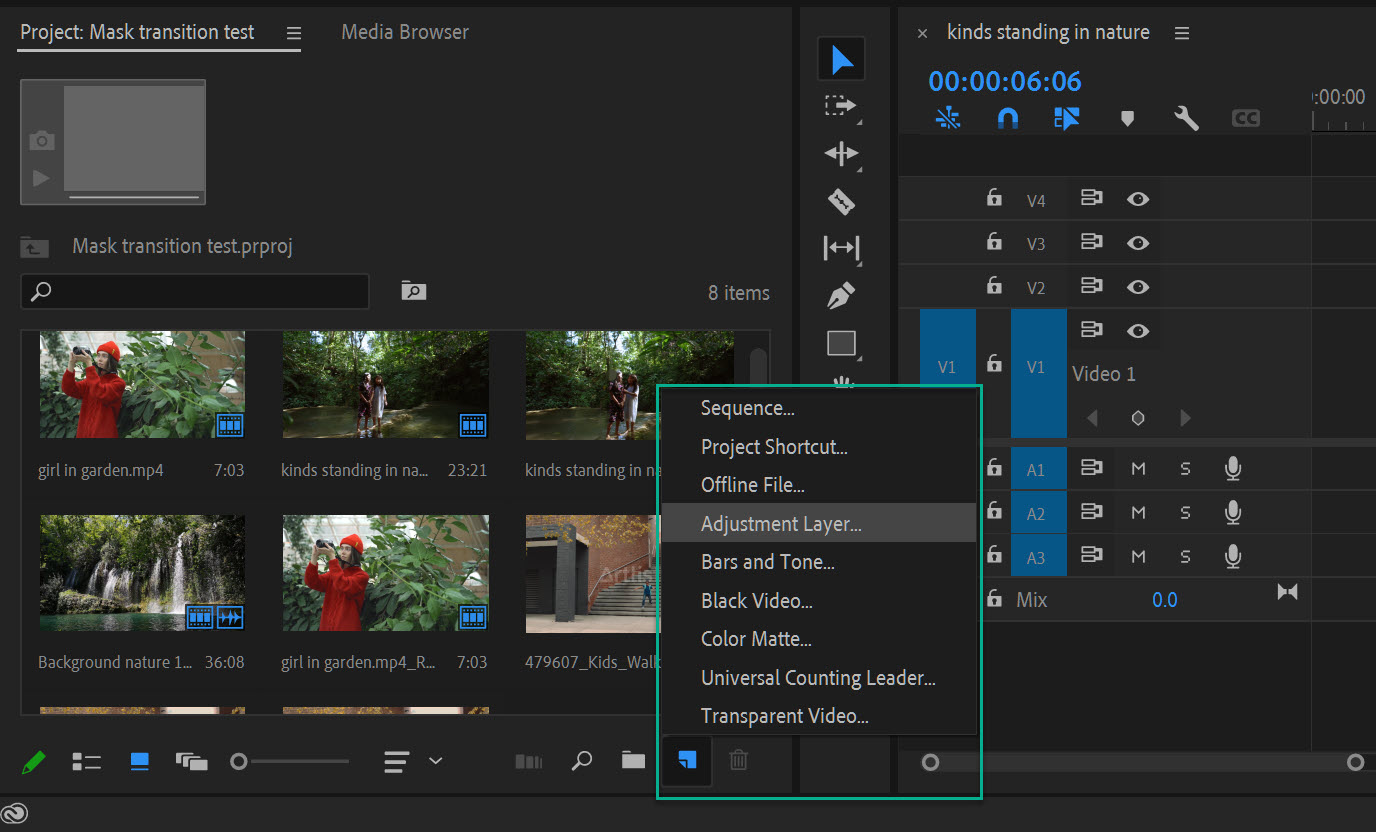
How to create an adjustment layer in premiere pro?
- Go to the project panel and click the New Item button.
- In the New Item menu, select Adjustment Layer.
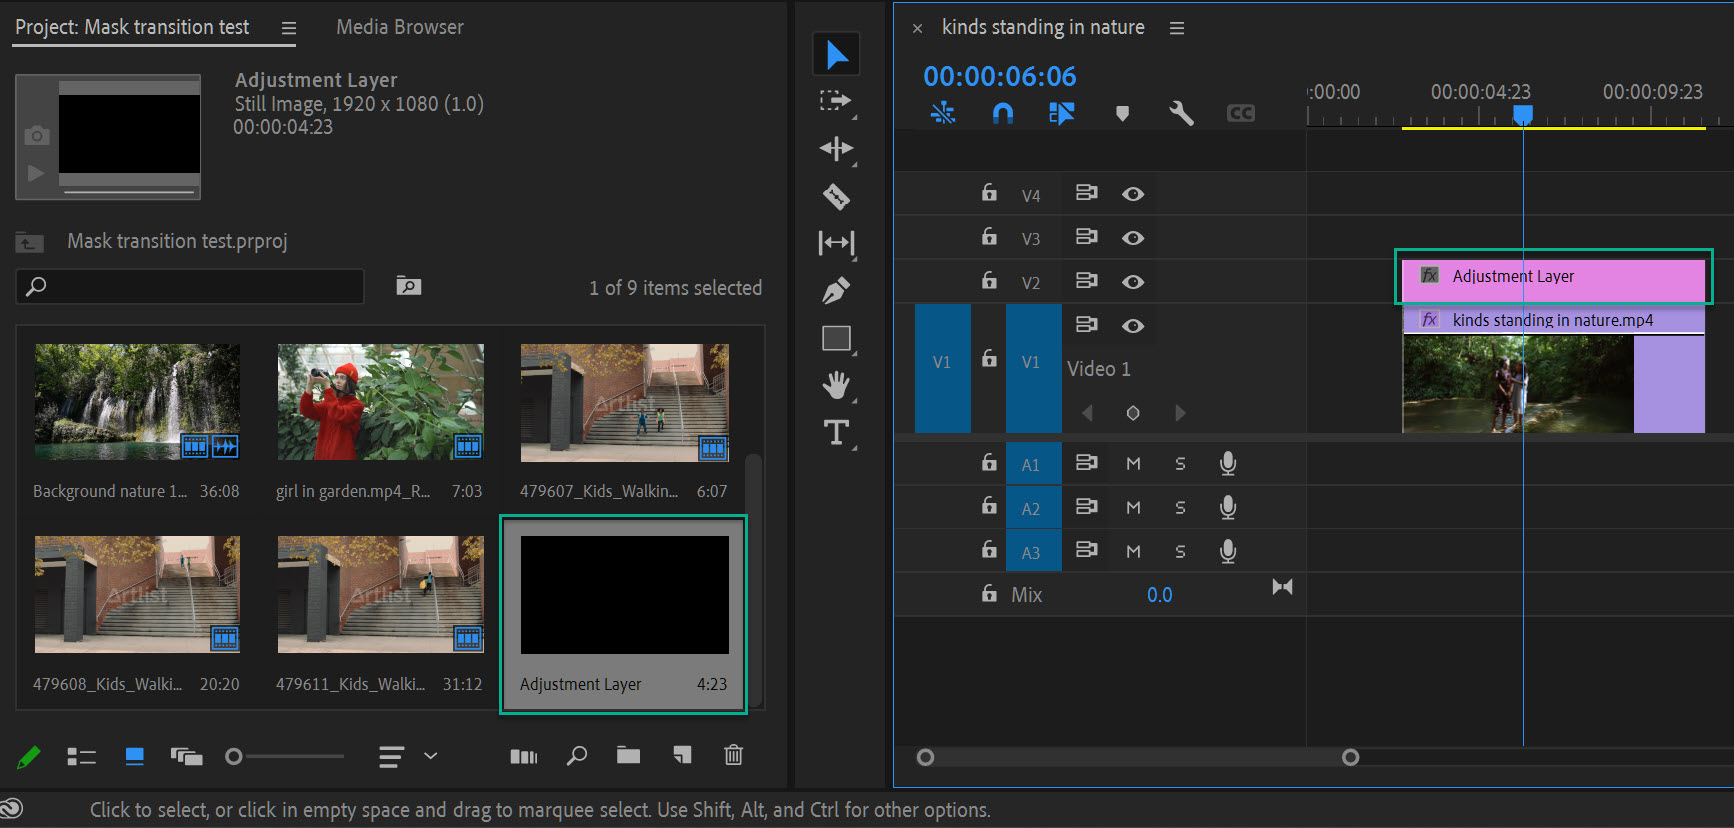
- The adjustment layer will appear as a black clip in your project.
How to use an adjustment layer
Once you have your adjustment layer created, you can add any video or audio effect to it from the Effects panel.
- To do this, simply drag and drop the desired effect onto the adjustment layer in the timeline.
- Any effects added to an adjustment layer will be applied to all video clips beneath it in the Timeline.
You can also use an adjustment layer to control a group of video clips at once.
- To do this, simply select all of the desired clips in the Timeline and then drag and drop them onto the adjustment layer.
- All of the selected clips will now be nested under the adjustment layer and controlled by it.
You can use an adjustment layer to change the color of your video, add a vignette, or even animate a graphic element
If you want to make changes to just one clip, you can use an alpha matte track matte.
Benefits of using an adjustment layer in premiere pro
An adjustment layer is like a piece of clear film that goes over your footage. Any effects you apply to the adjustment layer will show up on all the clips beneath it.
Adjustment layers are helpful because they let you nondestructively apply effects to your footage. That means you can always go back and change or remove the effect without affecting the original footage.
If you want to apply the same effect to multiple clips, you can do it by using an adjustment layer instead of applying the effect directly to each clip.
By applying effects to an adjustment layer, you can experiment with different looks for your project without having to commit to any changes.
In Conclusion,
Adjustment layers are a helpful tool in Premiere Pro that can be used to make global changes to your video.
By adding an adjustment layer and applying a preset, you can quickly change the look of your video without having to individually adjust each clip.